Why scan photos with iPhone or iPad?
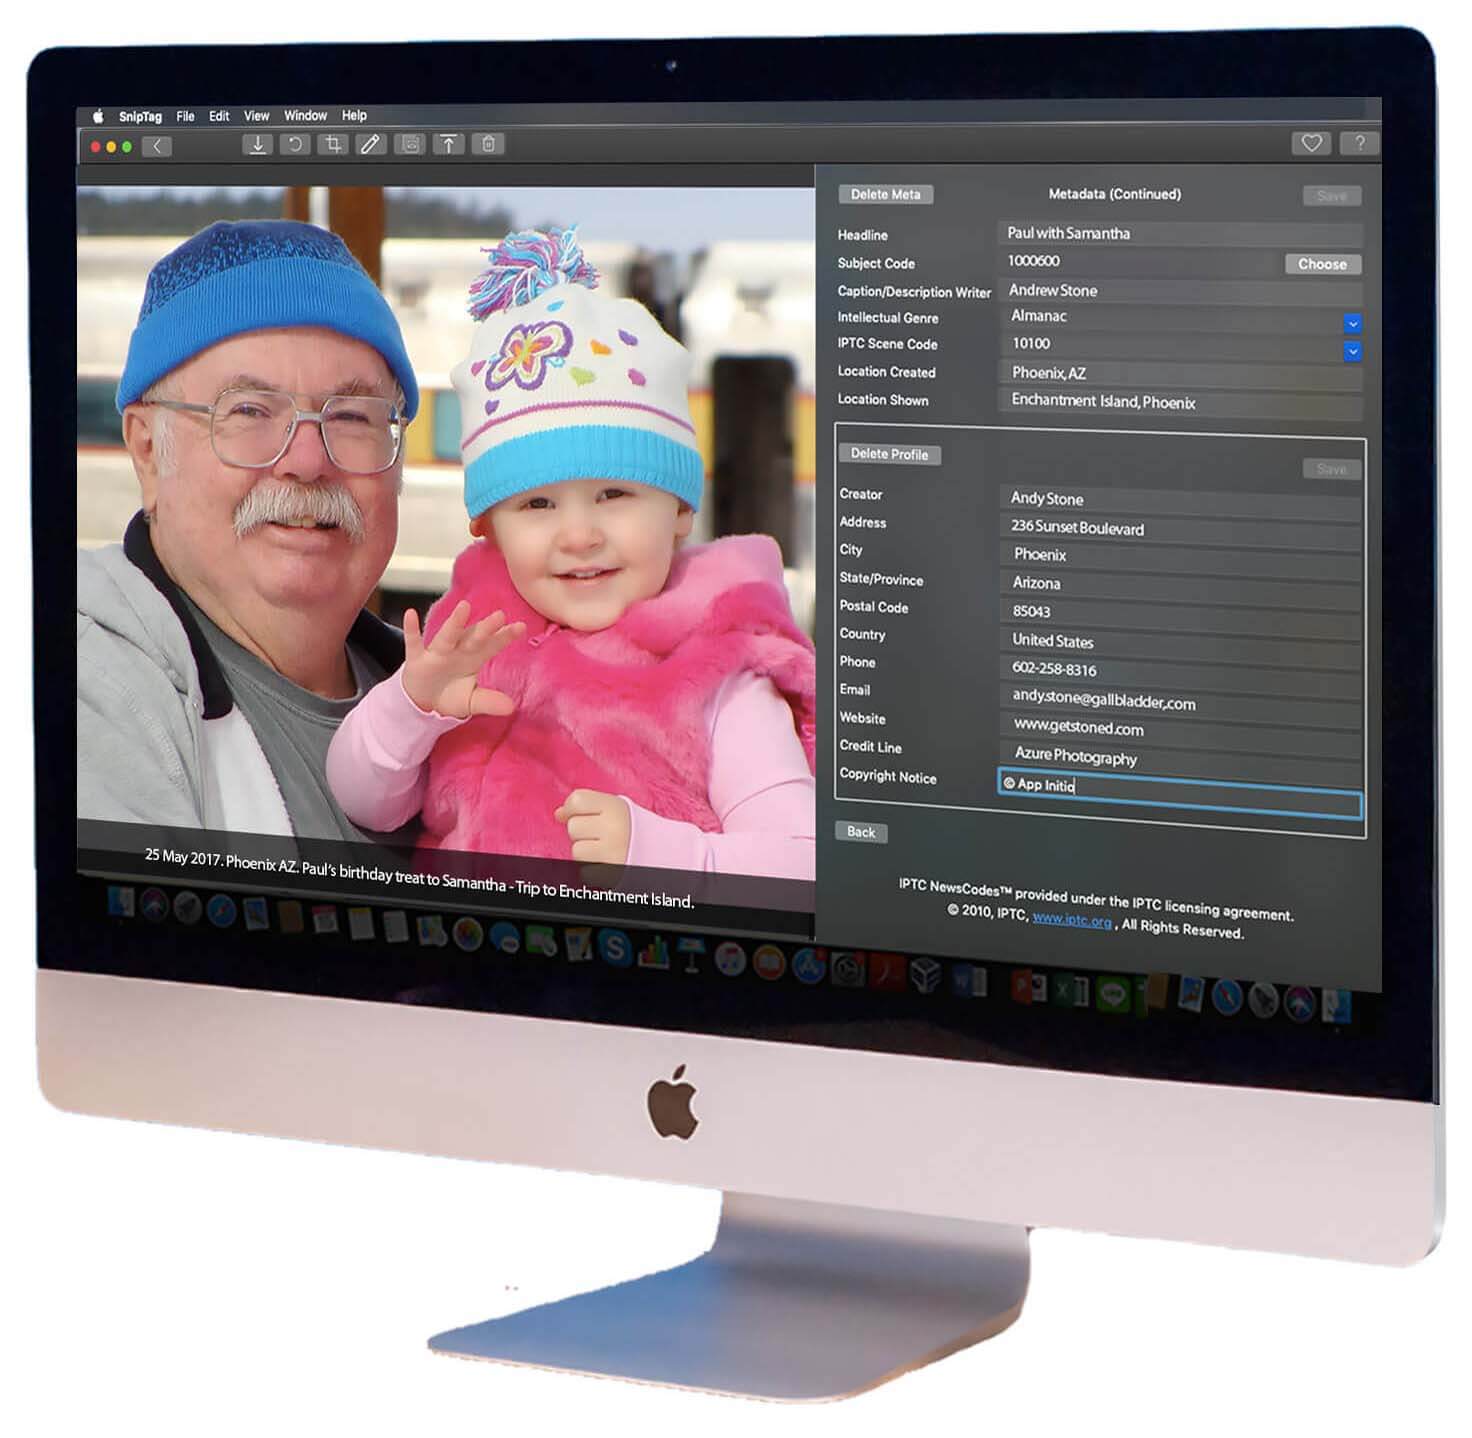
SnipTag is a macOS utility designed to help shutterbugs prep photos in two important ways. First, by cropping scanned pages containing multiple images in a single click, and then tagging the. SnipTag's powerful metadata editor supports more than 25 IPTC and EXIF metadata tags. Make your digital library of thousands of photos easy to manage and search. SnipTag's Metadata Viewer shows detailed EXIF, IPTC and TIFF data for every photo. And its Photo Finder can quickly retrieve the photos you need. SnipTag's powerful metadata editor supports more than 25 IPTC and EXIF metadata tags. Make your digital library of thousands of photos easy to manage and search. SnipTag's Metadata Viewer shows detailed EXIF, IPTC and TIFF data for every photo. And its Photo Finder can quickly retrieve the photos you need.
Because it’s the simplest way to do it. It’s faster and easier than hooking up a scanner to your computer, scanning one photo at a time, then manually cropping and saving each picture.
How’s the image resolution when you scan with iPhone?
Very good, if you do it the right way. Current iPhone and iPad models have 12 megapixel cameras, and their digital sensors are vastly improved. In practical terms, this means that you can get high resolution pictures even in less than ideal lighting conditions.
To get high quality scans, you need to follow a few simple rules.
7 tips for scanning photos with smartphones
These tips apply not just to scanning photos with an iPhone or iPad, but with any smartphone, tablet or digital camera.


1. Lighting: Ensure good lighting. Natural daylight is ideal for photo scanning. You want indirect or reflected light, e.g. near a window. With electric light, it’s hard to avoid glare, shadows and reflections. Colors also won’t be captured well, especially if scanning under fluorescent light.
Can you guess which of these scans was done by daylight and which under a table lamp?
2. No flash: Never use a flash when scanning, for exactly the same reasons as for electric and fluorescent lighting. See the reflections and flash glare in the photos below:
3. Don’t zoom: Using the digital zoom on your smartphone will reduce image resolution. Instead, hold the camera closer to the photos. As photozxels.com explains, “Digital zoom takes a central portion of the image and enlarges it, thus ‘simulating’ optical zoom. The camera crops a portion of the image and then enlarges it back to size. In so doing, you lose image quality.”
4. Scan fewer photos per frame: Scanning four at a time is faster, but you’ll lose on resolution. If you scan one or two photos at a time, you’ll get much sharper scans.
Fewer photos per frame
5. Steady hands: Since the photos being scanned are so close to the camera, you must hold your iPhone or iPad very steady while scanning. This can be difficult if you have shaky hards, especially with iPad. An easy solution is to place the iPhone or iPad on a locker stand, and place the photos below it. You may also use a Bluetooth remote or your iPhone’s headphone cable to operate the camera shutter remotely.
6. Hold camera closer (but not too close): Don’t hold the camera so far that in the viewfinder, the photos look like postage stamps. And don’t hold it so close that the photos extend beyond the scanner frame. All four corners of every photo must be visible in the scan.
In the above examples, #1 is the correct way to scan. In #2, the camera is too far. Too much background; too little photo. So, while cropping will be correct, more pixels will be discarded and you’ll get a low resolution scan. #3 is also wrong, because if the camera is too close and the photo extends beyond the scanner frame, cropping may be inaccurate.
7.Tap to focus: iOS cameras auto-focus pretty fast, but if the photos look blurred in the viewfinder, the scans will also be blurry. Tap the screen once to force focus, and then tap the shutter.
A couple of good photo scanner apps
Sniptag For Mac

Pic Scanner was the world’s first mobile app for scanning and auto-cropping multiple photos per click. Pic Scanner Gold is the much-enhanced incarnation of this pioneering app.
Pic Scanner Gold and its lite version, Pic Scanner both let you scan four photos at a time (or an entire album page). They then detect, separate, enhance and save all the photos as individual images. It’s a fast, easy, and inexpensive way of scanning photos. Pic Scanner Gold is meant for newer devices (iPhone 6s and newer), and has more features. Pic Scanner is for older devices. You can read about these apps, and download them, at the links given above, or at their website.
Sniptag
Need higher resolution, or formats other than JPG?
Photo scanning with the above apps on iPhone and iPad is good enough for most uses. But there is one more option if you have a scanner that doesn’t do auto-cropping, or have a 50 megapixel DSLR or mirrorless camera, or an Android phone. And you want to either go higher than 12 MP offered by iOS devices, or want to scan in PNG or TIFF (non-lossy) formats.
You’ll need a Mac, and an app called SnipTag. It has two functions:
SNIP: Scan up to 8 photos at a time (at 500-600 PPI or even higher resolution) with any scanner, digital or smartphone camera. Import a bunch of such “composite” scans into SnipTag, and it’ll auto-crop them instantly. The app handles JPG, PNG, TIFF and BMP files and faithfully preserves scan resolution. That’s really powerful.
Sniptag
TAG: SnipTag also lets you add captions and metadata to photos. You can either type or dictate descriptions, add locations, names, dates etc. That’s a great way to preserve memories.
Sniptag For Windows
Check out SnipTag on the Mac App Store. It’s quite an amazing app.
